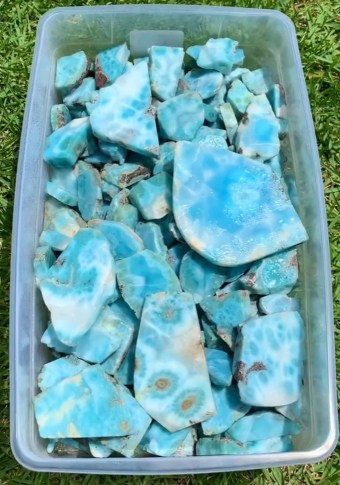
Larimar is a beautiful blue variety of Pectolite found only in the Dominican Republic and it’s the only gemstone sourced from the entire Caribbean. Pectolite isn’t rare and is commonly found throughout the world but larimar is the exception.
You’ll also notice the color of larimar is a mirror reflection of the blue-green ocean water and beaches that are located near the mining site.
How to Identify Larimar Through Testing
There are various ways to identify rocks, minerals, crystals, and gemstones, but we will use a method I learned while attending the Gemological Institute of America. If you’ve learned a unique way to identify gems, please share it with us.
Let’s take a deeper look into how to identify larimar like a pro.

Visual Inspection
The visual inspection starts with what form of larimar you have. The questions below are relatively easy to answer, but each type will have its own process for identifying them.
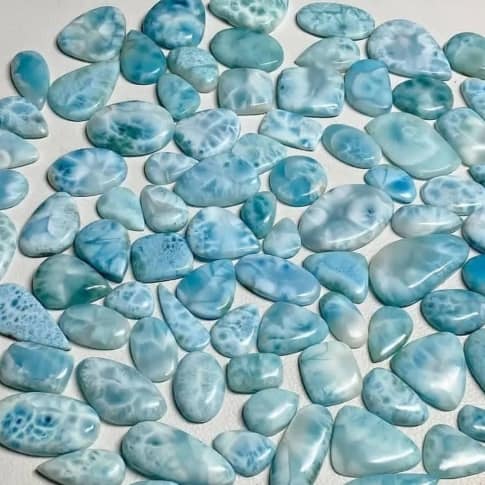
Is it a cabochon? A cabochon should have a medium to high polish with little to no pitting. When viewing the stone you’ll notice a blocky-looking web pattern with darker shades of greenish-blue in the middle and white streaks separating them. Most of the time larimar is cabbed in free-form shapes but you will see traditional shapes from time to time.
Is it faceted? Faceted larimar is uncommon because it does not have commercial value due to its opaqueness.
Is it a specimen? Larimar is found in different forms. You’ll better identify these forms by looking at and inspecting this mineral over time. Here’s a list of characteristics larimar displays when it’s a specimen.
- Ocean-blue to light blue in color with white or gray undertones.
- Specimens are typically small.
- Some specimens are reminiscent of geodes.
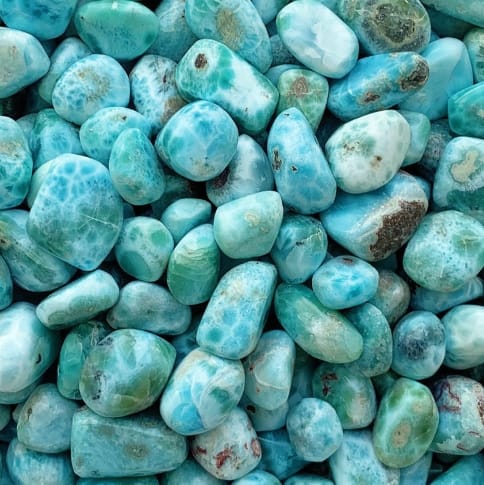
Is it tumbled? Very common to find tumbled larimar. Again, there will be a medium to high polish.
Physical Properties of Larimar
Let’s take a look at the physical properties of larimar. Knowing what to look for will help you more easily identify what you’re looking at.
Color: Blue, Green, Multicolored
Clarity / Transparency: Translucent to Opaque
Luster: Silky
Cleavage: Perfect 2,2
Fracture: Splintery
The Streak Test
This is a destructive test, so you need to ensure that you’re allowed to damage the specimen or stone if you choose to use this method. Once you’ve developed robust knowledge in identifying rocks and minerals, you won’t use destructive tests.
A mineral streak test is when you scrape the stone against a harder surface to see what color remains. Larimar has a white to pale blue streak.
Tumbled specimens are tested by scraping a specimen across a piece of ungalvanized porcelain, typically known as a streak plate.
Magnet Test
Larimar is not magnetic; therefore, the magnet test would be irrelevant.
Hardness Test
I don’t recommend actively testing the hardness of a stone because it’s destructive in nature and doesn’t really provide a definite answer to what type of stone it is. That said, larimar has a hardness of 4.5 to 5 on the Mohs hardness scale.
Refractive Index Test
Determining the refractive index, or RI as it’s referred to by gemologists, for larimar is relatively straightforward, but you’ll need a specific piece of test equipment and the RI fluid to go with it. Before you place the stone on the refractometer, you want to make sure you have a flat, somewhat polished surface to take a reading.
Larimar’s Refractive Index: 1.595 to 1.645
Each gemstone has its own RI, so discovering a sample’s RI can help you figure out what sort of stone it actually is.
Step 1 – Place a small bead of RI fluid on the metal surface of the refractometer near the back of the crystal hemicylinder (the window on which the stone will sit).
Step 2 – Place the stone facet face down on the fluid dot and slide it toward the middle of the hemicylinder crystal using your fingers.
Step 3 – Look through the viewer lens without magnification. Continue looking until you see the outline of a bubble, then look at the bottom of this bubble. Take the reading from there, rounding the decimal to the nearest hundredth.
Occasionally, you’ll run into the issue of not having a flat surface to work with. In this instance, you’ll need to leave the top of the refractometer open and hold the rounded stone with your hand. Hopefully, you’ll be able to pull a reading off of the gauge.
Birefringence Test
You won’t be using this test for larimar, but I wanted to include it in case you were considering it in your process.
Consider testing the birefringence, as well. Birefringence is related to RI. While doing the birefringence test, you will turn the gemstone on the refractometer six times throughout the observation period and note the changes.
Perform a standard RI test. Instead of keeping the stone still, gradually turn it 180 degrees, making each separate turn about 30 degrees. At each 30-degree mark, take a new RI reading.
Subtract the lowest reading from the highest to find the stone’s birefringence. Round it to the nearest thousandth.
Birefringence: δ = 0.028–0.038
Single or Double Refraction
You will not use this test for larimar, but I’ll include the instructions so you know how it’s done.
The stone must be transparent for this test to be accurate and beneficial. If the light won’t pass through the stone, then there is no way to test for single or double refraction.
Check for single or double refraction. Use this test on translucent and transparent stones. You can determine whether the stone is only singly refractive (SR) or doubly refractive (DR) to help identify it. Some stones can also be classified as aggregate (AGG).
Turn on the light of a polariscope and place the stone face down on the lower glass lens (polarizer). Look through the top lens (analyzer), turning the top lens until the area around the stone looks darkest. This is your starting point.
Turn the analyzer 360 degrees and watch how the light around the stone changes.
If the stone appears dark and stays dark, it is likely an SR. If the stone starts light and remains light, it is likely AGG. If the lightness or darkness of the stone changes, it is likely DR.
Checking The Diaphaneity
Diaphaneity refers to the mineral’s ability to transmit light. For instance, some minerals are transparent or translucent. A small amount of distortion might occur when they’re thick, but light will pass through them relatively freely.
Larimar is translucent to opaque.
Finding The Specific Gravity
Every stone has its unique specific gravity, which helps us identify them. Specific gravity is one of the best properties to measure when identifying mineral specimens. Most minerals have a narrow range of specific gravity, so getting an accurate measurement can go a long way toward identification.
Specific gravity is a unitless number describing how heavy a mineral is compared to equal volumes of water. For example, if a mineral is three times as dense as water, it’ll have a specific gravity of three. This is useful because while two minerals might be the same size, they’ll each have a different specific gravity.
The larger the sample, the more precise the readings tend to be. Remember that this technique can only be used for single mineral or crystal masses. It will not work for minerals embedded in host rocks.
Larimar’s Specific Gravity: 2.74 to 2.90
As helpful as specific gravity is for identifying minerals, amateurs are usually constrained by the need for more necessary tools for the job. However, one way to work around this is to hold the specimen and note how heavy or heft it feels compared to what you might expect a specimen of that size to weigh.
If you want to determine the specific gravity of your stone like a pro, you’ll need to invest in a higher-end scale. This is the one gemologists use OHAUS Density Determination Kit.
Identifying Rocks and Minerals Like a Pro
Hopefully, you feel confident in your practice to identify a piece of larimar after reading and applying this guide. You’ll be using the visual part of this guide the most, and you’ll get better as you interact with more gemstones. Before you know it, you’ll be identifying stones like a gemologist.
Feel free to reach out if you encounter any issues or need clarification. I’ll do my best to assist you in the identification process.

- Identify Enstatite - March 12, 2024
- Identify Cerussite - March 3, 2024
- Identify Bytownite - February 18, 2024
